To stabilize an inflatable cold plunge on a sloped backyard patio, you have to level the surface underneath the tub — never the tub itself. A filled 80-gallon inflatable plunge weighs 700 to 1,000 pounds, and even a 2-degree slope translates that mass into roughly 30 to 45 pounds of lateral shear on one side of the bladder. Over time that shear deforms the walls, stresses the seams, and eventually tips the unit when you climb in. The reliable fix is a layered base: rigid pavers or interlocking deck tiles shimmed to dead-level, a closed-cell foam mat on top for thermal isolation, and weighted perimeter anchors. The guide below walks through slope measurement, base materials, and the recovery accessories that pair well with a stabilized install.
Why a Sloped Patio Is the Hidden Threat to Inflatable Cold Plunges
Most concrete and paver patios are intentionally pitched 1\u20132 percent (about 1/4 inch per foot) so rainwater drains away from the house. That is invisible to the eye but catastrophic for an inflatable tub. Unlike a hard-shell plunge, the inflatable bladder cannot resist asymmetric loads — it bulges toward the downhill side, the water surface shifts off-center, and the top ring tilts. You end up with a tub that looks fine empty and dangerously crooked when full.
Finding the right stabilize inflatable cold plunge on sloped backyard patio comes down to matching watt-hours to your actual power needs.

Three failure modes follow:
- Seam delamination from sustained lateral stretch on the downhill seam.
- Cold spots and pump cavitation when the intake port sits above the waterline on the uphill side.
- Tip-over risk on entry, because your bodyweight stepping in compounds the existing imbalance.
The good news: you can stabilize an inflatable cold plunge on a sloped backyard patio with under $150 in materials and about 90 minutes of work, no concrete pour required.
Step 1: Measure the Actual Slope
Skip the eyeball test. Get a 4-foot bubble level or a digital inclinometer app and check the patio in the exact footprint where the plunge will sit. Measure in two perpendicular directions — patios often pitch diagonally toward a corner drain. Write down the high corner and the low corner; the difference in inches across the tub footprint is what you will shim out.
If the slope exceeds 1 inch over the tub's diameter (most 31\u201335 inch plunges), you will need a full leveling platform rather than shims alone. Anything under 3/4 inch is shim-correctable.
Step 2: Build the Three-Layer Base
Layer A \u2014 Load Spreader
Lay 24x24 inch interlocking rubber-top deck tiles or two sheets of 3/4 inch exterior-grade plywood directly on the patio, oriented so seams run perpendicular to the slope direction. This spreads the point load and gives you a flat reference plane to shim against.
Layer B \u2014 Leveling Shims
Use composite plastic shims (cedar shims rot in standing condensation). Drive them under the downhill edge until a level placed across the top of Layer A reads dead-center bubble in both axes. Trim flush with a utility knife. For slopes over 1/2 inch, stack two shims rather than forcing a single thick wedge.
Layer C \u2014 Thermal and Friction Pad
On top of the leveled platform, place a 1 inch closed-cell EVA foam mat (the kind sold as gym flooring). It insulates the bladder from the cold patio in winter, eliminates the squeak of vinyl-on-plywood, and provides a high-friction surface so the tub does not creep when you climb in.
Step 3: Anchor the Perimeter
Even leveled, an inflatable plunge can shift if it gets bumped or if wind catches the cover. Place four 25-pound sandbags or rubber-coated barbell plates at the four cardinal points of the tub base, snug against the bladder. They do not need to be tied on — gravity and friction with the foam mat do the work. This perimeter weighting also dampens water sloshing during use.
Recovery Tools That Pair With a Stabilized Outdoor Plunge
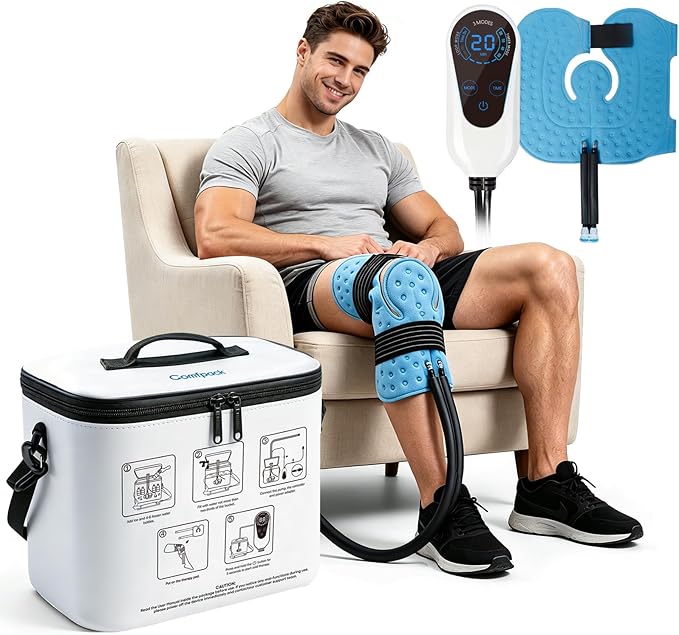
Once your plunge sits flat and safe, the next limitation is targeted recovery. Whole-body immersion is excellent for systemic inflammation, but if you are rehabbing a specific knee or shoulder injury, a circulating cold therapy machine delivers focused, prolonged cooling that a plunge cannot match. The picks below are the units that work best as a companion to an outdoor inflatable setup — they are quiet enough for patio use, capacity-matched to longer protocols, and programmable for unattended sessions.
| Model | Reservoir | Best For | Timer |
|---|---|---|---|
| CF-3 Pro | 16.8 QT | Knee, shoulder, hip post-plunge | Programmable |
| CF-1 Quiet | ~9 QT | Post-surgery knee recovery | Basic |
| Portable Programmable | ~10 QT | Targeted joint icing with set-and-forget timing | Programmable |
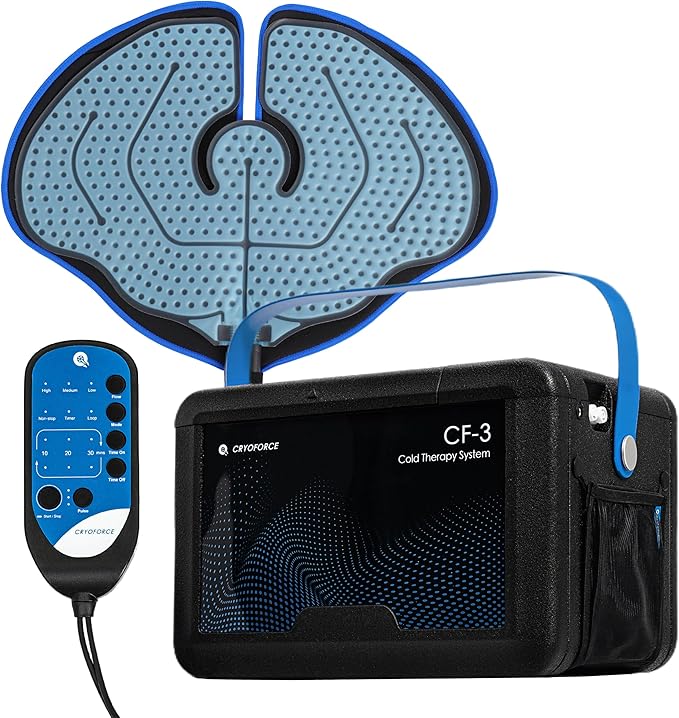
CF-3 Pro Cold Therapy Machine \u2014 Best Large-Capacity Companion
The CF-3 Pro carries a 16.8-quart reservoir, which is the practical sweet spot for back-to-back sessions after a plunge \u2014 you can run 45 to 60 minutes of continuous cooling on a knee or shoulder without refilling. The pump runs quiet enough that you can leave it on a patio side table while you decompress in a robe. Check the CF-3 Pro on Amazon.
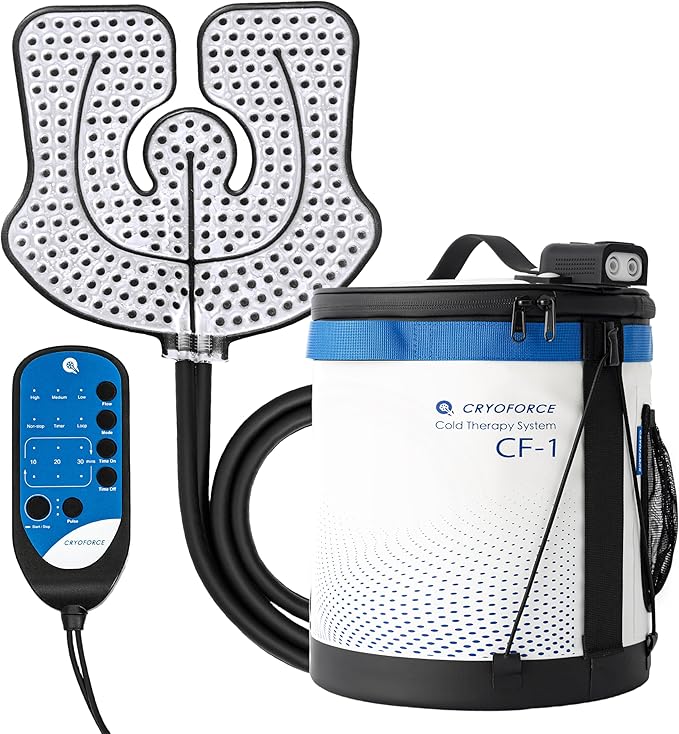
CF-1 Quiet Cold Therapy Machine \u2014 Best for Post-Surgical Knee Work
If you bought the inflatable plunge to support a specific surgical recovery (ACL, meniscus, rotator cuff), the CF-1 is the smaller, near-silent unit clinicians actually recommend for the first 6 weeks post-op when whole-body immersion is contraindicated. See the CF-1 on Amazon.
Portable Cold Therapy Machine with Programmable Timer \u2014 Best Set-and-Forget Option
For unattended sessions \u2014 say, icing a knee while you eat dinner after your plunge \u2014 the programmable timer on this portable unit cycles cooling on and off automatically, which prevents the skin damage that comes from leaving a static cold pad on too long. View the portable timer model on Amazon.
Common Mistakes to Avoid
- Skipping the load spreader. Setting shims directly on pavers creates point loads that crack the pavers within a season.
- Using a tarp instead of foam. A tarp adds zero thermal break and lets the bladder slide.
- Filling the tub to test level. Always level dry. Water makes the bladder conform to whatever it is sitting on and hides the slope.
- Anchoring with rope tied to the patio. This concentrates force on the bladder's grommets and tears them out within months.
Once your base is dialed in, dig into our related guides on cold plunge weight capacity for residential patios, winterizing an inflatable cold plunge outdoors, and choosing complementary cold therapy recovery tools for a complete outdoor recovery station.
Frequently Asked Questions
Can I put an inflatable cold plunge on grass or pavers without leveling first?
No. Grass compresses unevenly under 800+ pounds and creates a moving slope within days. Pavers are usually pitched for drainage. In both cases you need the three-layer base described above before adding water.
What is the maximum slope an inflatable cold plunge can tolerate before it becomes unsafe?
Practically, any visible tilt is too much when full. Industry installers use 1/8 inch over the tub diameter as the upper bound \u2014 roughly 0.3 degrees. Beyond that, the asymmetric water pressure deforms the bladder and shifts the center of gravity dangerously during entry.
Do I need a permit to install an inflatable cold plunge on a residential patio in 2026?
In most US jurisdictions, no \u2014 inflatable plunges under 24 inches deep are treated as portable recreational equipment, not pools. However, HOAs and some municipalities require a permit if the unit is left filled for more than 30 days or connected to a permanent water line. Check locally before plumbing it in.
Will the inflatable bladder freeze and crack if I leave it on a sloped patio through winter?
The bladder itself is freeze-tolerant when empty, but pooled water at the downhill seam can freeze and expand, which is exactly the failure point you are trying to prevent by leveling. If you keep it filled in winter, a circulating chiller plus the leveling base eliminates the pooling risk.
Can I use stacked plywood instead of interlocking deck tiles as the load spreader?
Yes, with two caveats: use exterior-grade plywood (CDX or marine ply), and seal the edges with polyurethane. Untreated plywood will swell and warp within one rainy season, which reintroduces the slope you just corrected.
How much does a full DIY leveling base cost compared to a commercial cold plunge platform?
A DIY layered base runs $90 to $160 depending on tile choice. Commercial pre-built cold plunge platforms run $400 to $900 and are usually overkill for an inflatable unit \u2014 they are designed for hard-shell tubs that weigh twice as much.
Does a leveled inflatable plunge improve chiller efficiency?
Yes, measurably. When the bladder sits level, the intake and return ports stay fully submerged, so the chiller pump moves water instead of cycling air. Users typically see a 10\u201315 percent reduction in time-to-target-temp after correcting a sloped install.
Key Takeaways
- Choosing the right stabilize inflatable cold plunge on sloped backyard patio means matching capacity and output ports to your actual devices
- Always check actual watt-hours (Wh), not just watts — runtime depends on Wh, not peak output
- Also covers: leveling inflatable ice bath uneven ground
- Also covers: cold plunge slope adjustment
- Also covers: tilted patio plunge tub fix
- Compare price-per-Wh across models to find the best value for your budget