To insulate outdoor cold plunge tub freezing winter setups effectively, use a three-layer system: 2-inch rigid foam insulation wrapped around the tub exterior, an R-12 or higher insulated cover for the top, and a low-wattage tank heater or freeze-protection mode on your chiller. This combination keeps water in the 38–50°F sweet spot through subzero nights, prevents cracked shells from ice expansion, and slashes energy use by 40–70%. Below you'll find the exact materials, a step-by-step installation walkthrough, three indoor backup recovery tools for nights when it's too dangerous to plunge outside, and answers to common cold-weather plunge questions for 2026.
Why outdoor cold plunge tubs need winter insulation
An uninsulated outdoor plunge in subfreezing weather faces three serious threats. First, water below 32°F expands roughly 9% as it freezes, which can crack acrylic, fiberglass, and even stainless-steel shells if the pressure has nowhere to escape. Second, your chiller pump, drain valves, and plumbing lines can freeze solid overnight, splitting PVC and ruining seals. Third, even when the water stays liquid, ambient cold drives heat exchange in the wrong direction — the system fights to keep water from getting too cold for safe immersion below 33°F.
When shopping for insulate outdoor cold plunge tub freezing winter, it pays to compare specs, capacity, and real-world runtime before committing.
The goal of proper insulation isn't to "keep things warm." It's to slow heat transfer in both directions so your chiller, ice supply, or ambient cooling can maintain a stable, plunge-ready temperature without freeze damage. Done correctly, your tub uses far less electricity, ice lasts three to four times longer, and you can plunge through January in Minnesota the same way you would in mild March weather. If you're still shopping, our 2026 cold plunge tub buying guide covers which models ship with winter insulation already built in.
The three-layer winter insulation system
Layer 1: Rigid foam exterior wrap
The single most cost-effective upgrade is wrapping the exterior of your tub in 2-inch rigid XPS foam board (R-10 total) or 1.5-inch polyiso (R-9.75 total). Polyiso has the highest R-value per inch but degrades when wet, so it must be sealed with vapor barrier. XPS is moisture-resistant out of the box and is the better choice for most DIY installs in wet climates. Cut panels to fit around the sides and bottom of the tub, leaving access for drain valves and chiller lines. Secure with construction adhesive or foil tape, then wrap the entire assembly in foil radiant barrier or weatherproof cedar cladding.
Pay special attention to the bottom of the tub. Heat sinks downward into cold ground or decking, and most owners ignore this. A 2-inch foam base, either rigid board or sprayed closed-cell foam, can cut overnight temperature drift by 30–40%.
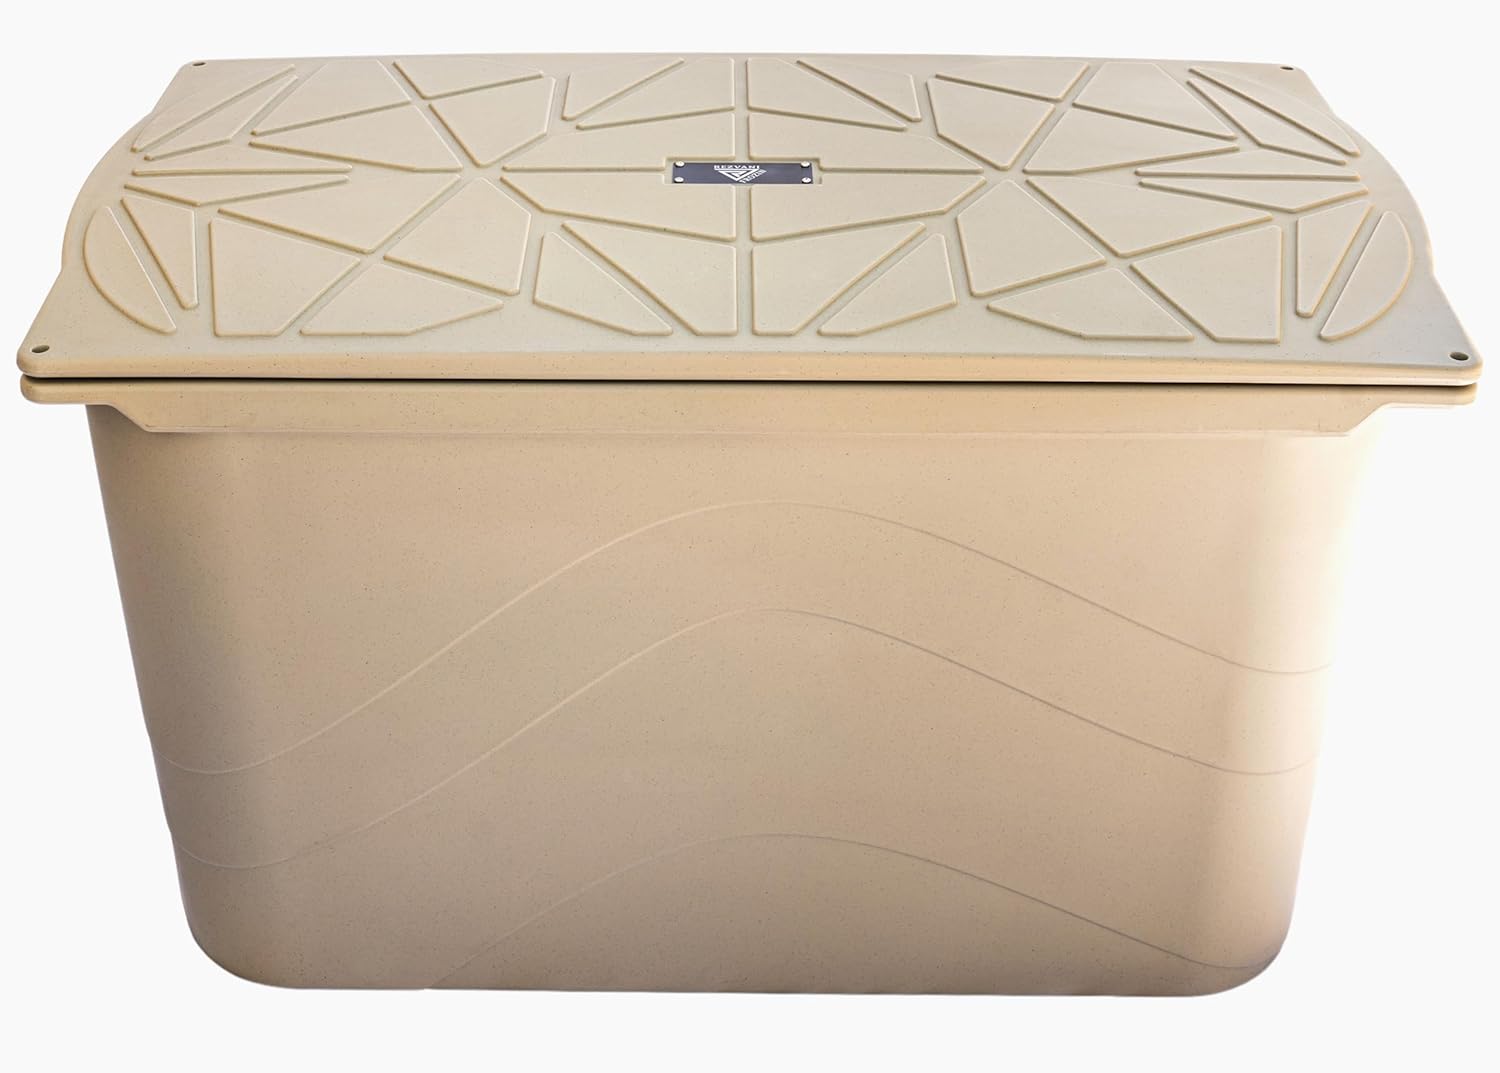
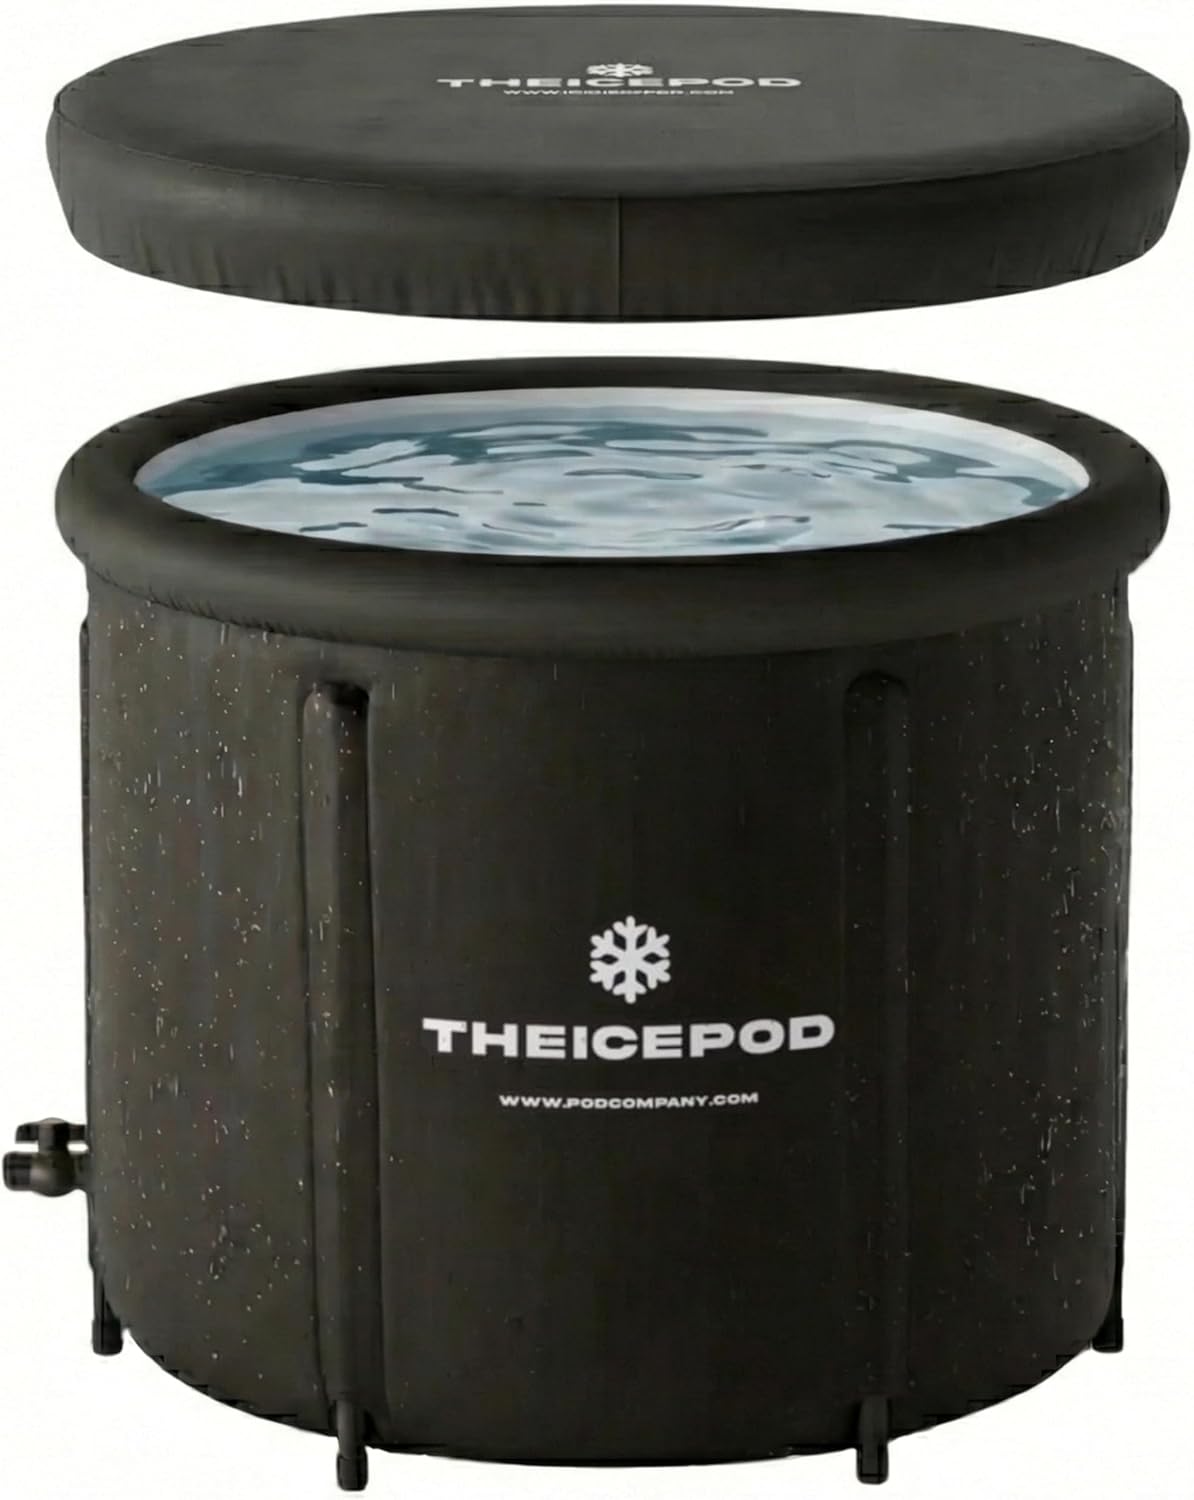
Layer 2: Insulated cover
An insulated cover is non-negotiable for outdoor plunges in freezing climates. A hot-tub-style cover with a 2–4 inch EPS foam core, vapor barrier, and marine vinyl shell will reduce surface heat loss by 80% or more. Surface evaporation is responsible for the majority of energy loss in an outdoor plunge — covering the water when not in use is more impactful than any side insulation. Look for covers rated R-12 or higher with a tapered design that sheds snow.
For DIY builds, you can stack two layers of 2-inch EPS or XPS foam board cut to the tub's interior dimensions, wrap them in heavy mil plastic, and place a marine vinyl shell over the top. This homemade solution costs about $80 versus $400+ for a commercial cover.
Layer 3: Freeze-prevention heating
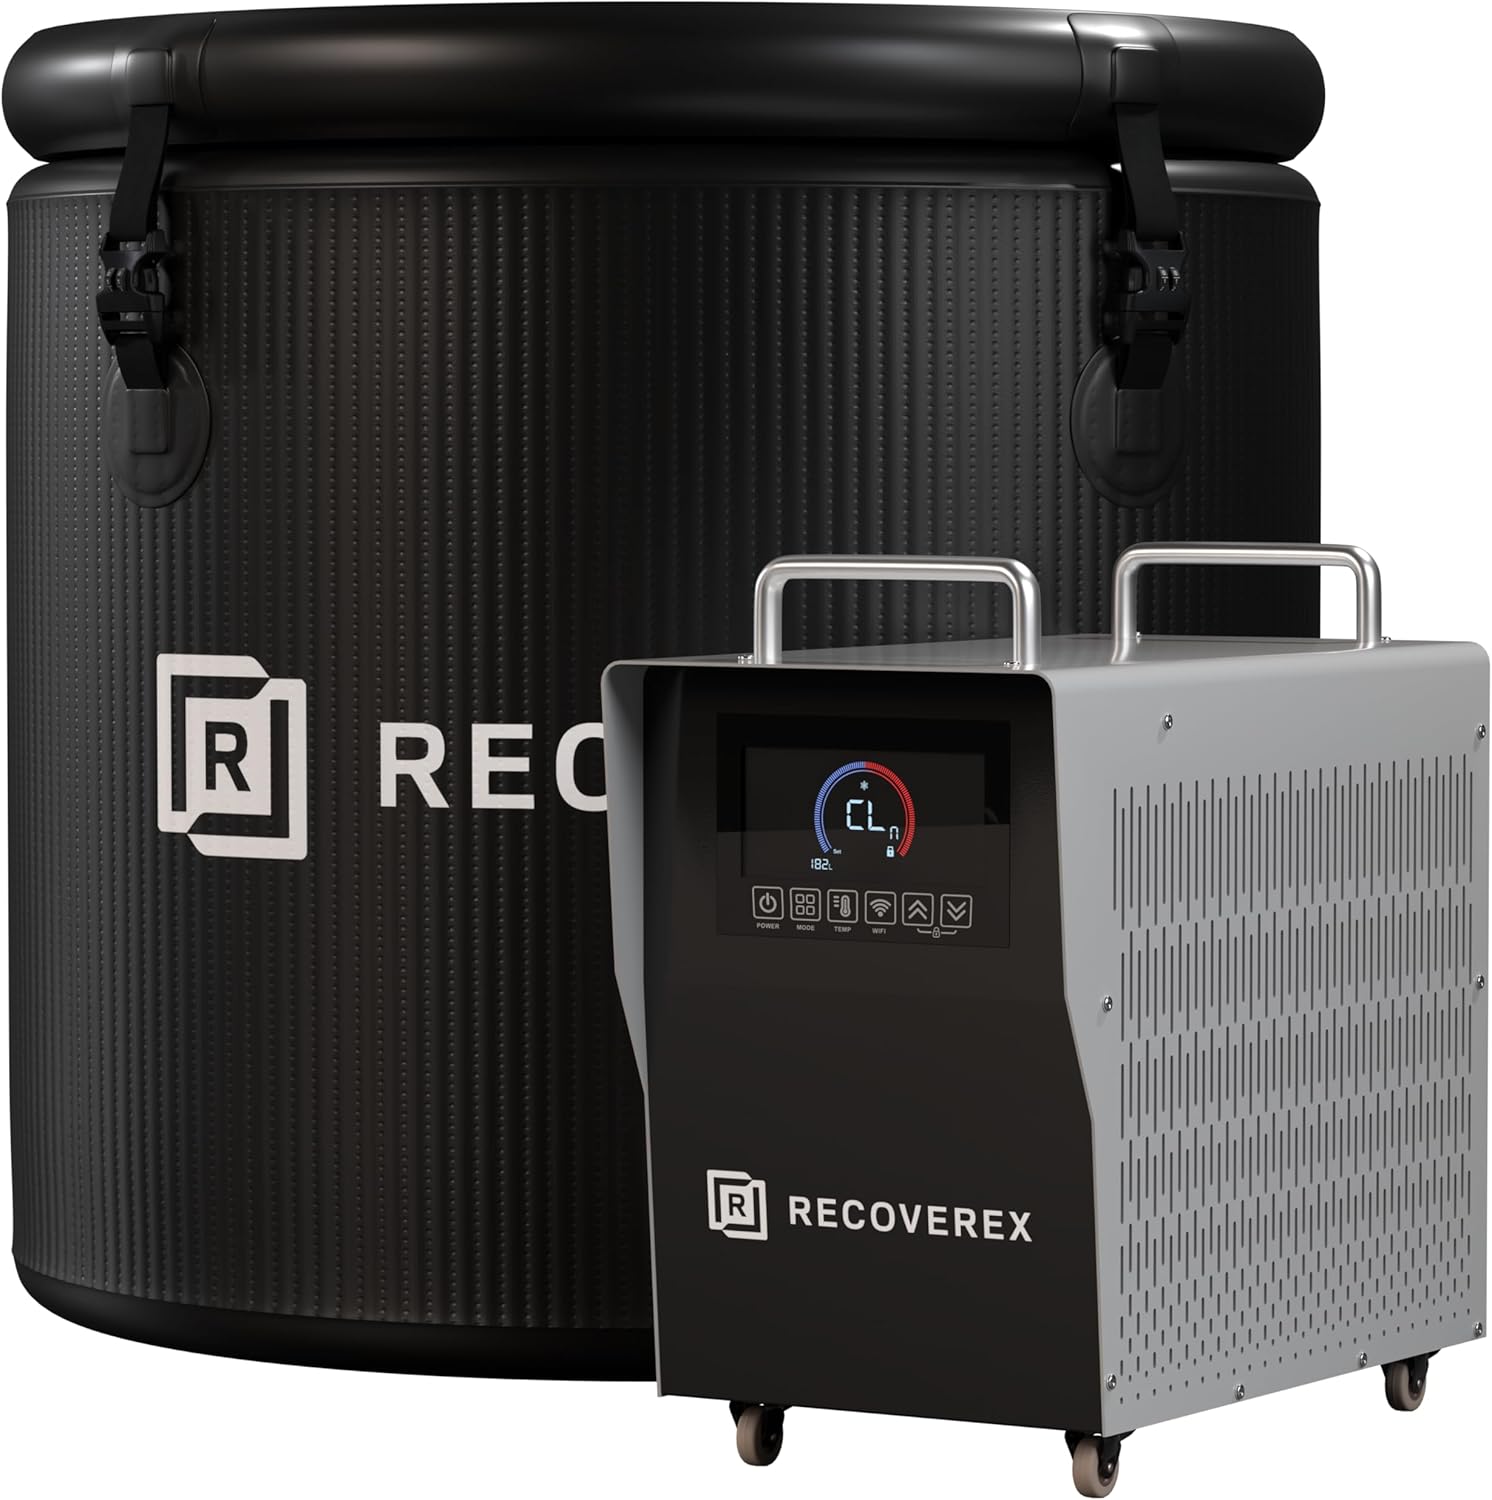
It sounds counterintuitive for a cold plunge, but a low-wattage tank heater (200–500W) or freeze-protection mode on your chiller keeps the water above 33°F even when ambient temperatures fall to -20°F. Many quality chillers — including the Plunge All-In, BlueCube Pro, and Ice Barrel chilled models — include this mode as a standard feature. If yours doesn't, add a stainless aquarium-style tank heater with a thermostat set to 34°F. The heater only cycles when needed, costing pennies per night to prevent thousands of dollars in freeze damage.
Don't forget your plumbing lines. Heat-trace cable rated at 3–6W per linear foot wrapped around exposed PVC and tucked into 3/4-inch foam pipe sleeves prevents the most common failure point: a frozen drain line splitting at the bottom elbow.
Step-by-step: insulate outdoor cold plunge tub freezing winter installation
Here's the exact process used by professional installers to weatherize an outdoor plunge for the first time. Budget about 6–8 hours for the initial install on a 100-gallon tub, plus drying time for adhesive.
Materials checklist
- 4 sheets of 2-inch XPS rigid foam board (4'×8')
- 1 roll of foil-faced radiant barrier wrap (25 sq ft minimum)
- Construction adhesive (Loctite PL Premium or PL 300)
- Foil HVAC tape (Nashua 322 or equivalent)
- Heat-trace cable rated for outdoor pipe use
- Pipe insulation foam sleeves, 3/4-inch ID
- Commercial insulated cover (R-12 or higher) or DIY foam stack
- 200–500W stainless tank heater with adjustable thermostat
- Optional: cedar or composite skirting panels
Installation sequence
Step 1 — Drain and dry the tub completely. Any trapped moisture between the shell and foam will freeze and damage both surfaces. Allow 24 hours of dry time after the final wipe-down.
Step 2 — Measure and cut foam panels. Wrap a string around the tub at the widest point to get the circumference, then add 6 inches of overlap. Cut panels to the tub's exterior height. Score and snap with a utility knife — XPS cuts like soft cheese.
Step 3 — Adhere foam to the shell. Apply construction adhesive in vertical S-patterns, press each panel firmly into place, and tape all seams with foil HVAC tape. The tape both reflects radiant heat and seals against moisture infiltration.
Step 4 — Insulate the base. If your tub sits on a deck or pad, slip a 2-inch foam panel underneath, or build a 2x4 frame and fill it with rigid foam sheets. For ground installs, dig out 4 inches and lay down a foam slab before placing the tub.
Step 5 — Wrap plumbing in heat-trace and foam sleeves. Run heat-trace cable along every exposed line from the chiller to the tub. Spiral, don't overlap. Slip pipe foam over the top and seal ends with tape.
Step 6 — Install the tank heater. Mount the stainless heater inside the tub below the waterline, set the thermostat to 34°F, and plug into a GFCI outlet. Test by lowering an air-temperature probe over the tub overnight.
Step 7 — Add radiant barrier and skirting. Wrap foil radiant barrier around the entire foam exterior with the reflective side facing outward. Finish with cedar or composite skirting for a polished look. See our DIY ice bath build guide for skirting design ideas.
Indoor backup cold therapy machines for extreme weather days
Even the best-insulated outdoor plunge has limits. When wind chills drop below -10°F or your safety routine is interrupted by ice storms, you still need recovery. Targeted cold therapy machines deliver focused, regulated cold to specific joints and muscle groups indoors. They're not a replacement for whole-body plunging, but they're a smart backup for athletes, post-surgery patients, and anyone whose recovery routine can't pause for weather.
Comparison: top indoor cold therapy backup machines for 2026
| Model | Tank Capacity | Best For | Programmable Timer |
|---|---|---|---|
| CF-3 Pro Cold Therapy Machine | 16.8 QT (extra-large) | Knee, shoulder, and large muscle groups | Yes |
| CF-1 Quiet Cold Therapy Machine | Standard | Bedside and post-surgery use | Yes |
| Portable Programmable Cold Therapy Machine | Compact | Travel and storage-limited spaces | Yes |
| ACL Recovery Ice Machine | Standard | Budget post-surgery knee cooling | No |
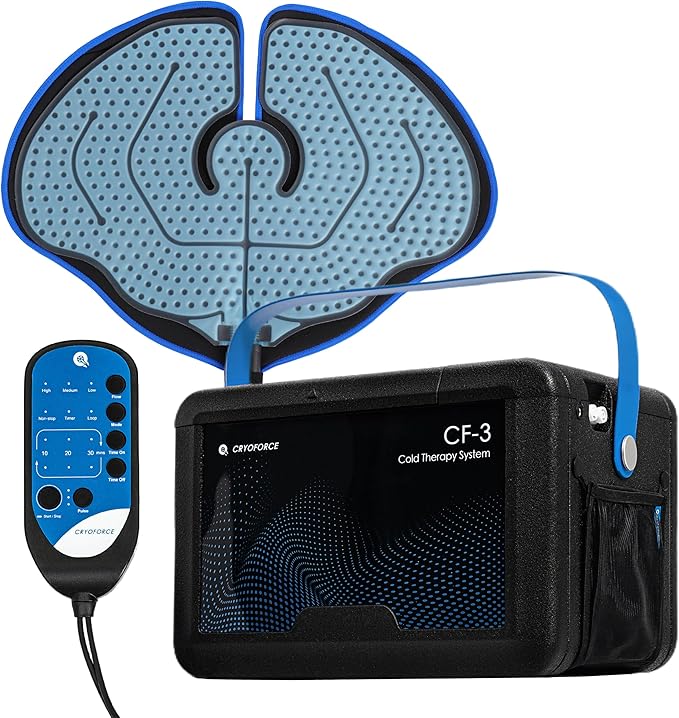
CF-3 Pro Cold Therapy Machine — best for whole-leg and shoulder recovery
The CF-3 Pro's 16.8-quart tank is the largest in this category, which means significantly fewer ice refills during a 30–60 minute therapy session. The oversized reservoir holds enough chilled water to maintain a consistent 40–50°F output for hours, making it ideal for athletes who need extended cold therapy on quads, hamstrings, knees, or shoulders after a missed outdoor plunge day. The included pad system uses a sealed circulation loop rather than direct ice contact, so you avoid the frostbite risk of raw ice packs. Check the CF-3 Pro on Amazon.
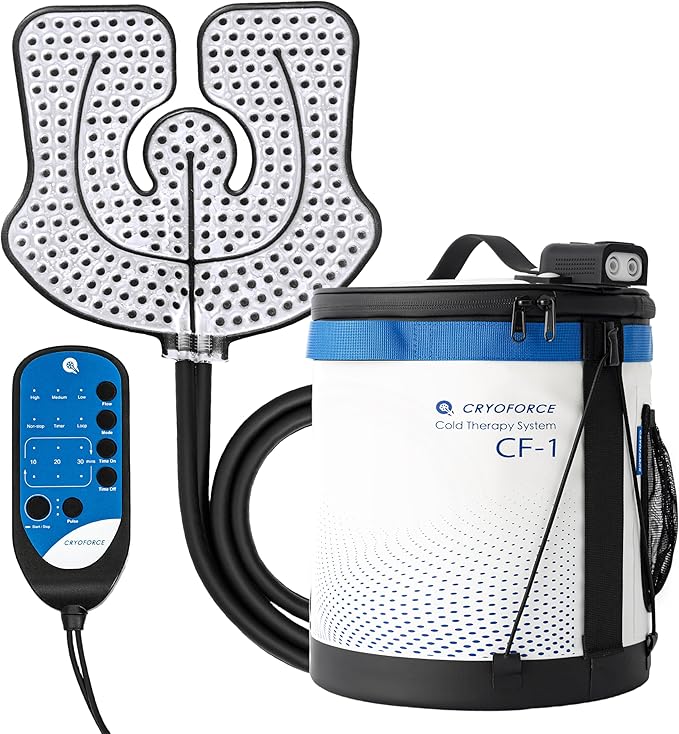
CF-1 Cold Therapy Machine — quietest option for nighttime recovery
If you're recovering from knee or shoulder surgery and need overnight cold therapy without a noisy pump waking you up, the CF-1 is purpose-built for quiet operation. The pump runs well under 40 dB, quieter than a refrigerator hum. It includes a programmable timer so you can set 15-minute-on, 30-minute-off cycles to prevent skin damage during long sessions. Check the CF-1 on Amazon.
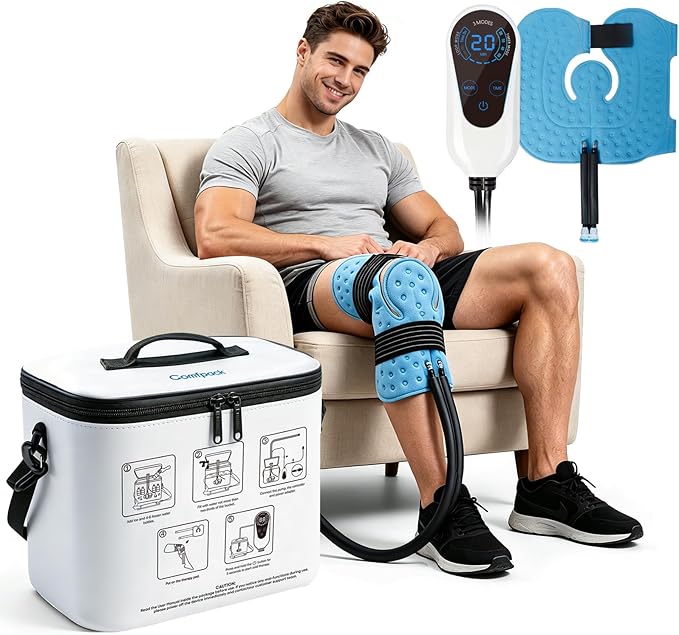
Portable Programmable Cold Therapy Machine — best for compact storage
For apartment dwellers, RV travelers, or anyone short on space, this compact unit delivers the same programmable timer functionality in a smaller footprint. It's ACL-recovery rated and works well for knee, ankle, and elbow joints. The portable form factor also makes it useful as a "follow you around the house" cold therapy tool when your outdoor tub is temporarily off-limits. Check the portable model on Amazon.
Cold Therapy Machine for Knee Surgery Recovery — budget pick
If you primarily need post-op or post-workout knee cooling without bells and whistles, this straightforward ice machine handles ACL, meniscus, and general post-surgery recovery at an entry-level price point. Check this model on Amazon.
Common winterization mistakes to avoid
Most winter cold plunge failures trace back to four avoidable mistakes. Skipping the bottom insulation is the most common — owners wrap the sides but forget the floor, and ground conduction kills efficiency. Leaving plumbing exposed causes more split pipes than any other issue. Using indoor-rated foam outside leads to UV breakdown and crumbling insulation by year two. And relying on the chiller alone for freeze prevention puts unnecessary strain on the compressor — pair it with a dedicated tank heater for resilience.
Our chiller buying guide covers which units come with built-in freeze protection so you don't have to retrofit a heater after the fact.
Frequently Asked Questions
How cold is too cold to use an outdoor cold plunge in winter?
The water itself should stay between 38–50°F for safe therapy. If your tub water drops below 36°F, immersion becomes dangerous: cold shock response intensifies, breath control becomes difficult, and the risk of cardiac arrhythmia rises sharply. Ambient air temperature matters less than water temperature, but plunging when wind chills are below -10°F is risky for the brief transition to and from the tub. A proper insulation system keeps the water in the safe zone regardless of outside conditions.
What R-value of insulation do I need for an outdoor cold plunge tub?
Aim for a minimum total assembly R-value of R-15 on the sides and base, and R-12 or higher on the top cover. In USDA hardiness zone 6 or colder climates, bump those numbers to R-20 sides and R-15 top. Most 2-inch XPS gives you R-10, so a single layer alone isn't enough for the coldest regions — either double up to 4 inches or add foil radiant barrier and pack any voids with closed-cell foam.
Can I use spray foam to insulate my cold plunge tub?
Yes, closed-cell spray polyurethane foam at 2 lb/cu ft density is an excellent choice and is what manufacturers use on premium tubs. It gives roughly R-7 per inch, conforms to curved surfaces, seals out moisture, and adds structural rigidity. The downside is cost ($400–$800 for a DIY kit) and the irreversibility — once sprayed, you can't access plumbing without cutting it back out. Use rigid board for any tub where you might need to service the shell later.
Do I need to drain my outdoor cold plunge tub in winter?
No — and you actually shouldn't if you've insulated properly. A full tub of water has enormous thermal mass that resists temperature swings, while an empty tub experiences much greater shell stress as it heats and cools. Keep the water in, run the chiller in freeze-protect mode, and use the tub as you would any other season. If you must drain for an extended absence, blow out all plumbing lines with compressed air to prevent split pipes.
How much does it cost to insulate an outdoor cold plunge tub for winter?
A complete DIY insulation package — foam board, radiant barrier, heat-trace cable, pipe sleeves, tank heater, and an insulated cover — runs about $400–$700 depending on tub size and whether you DIY or buy a commercial cover. Professional installation adds $500–$1,200. The payback is typically under one winter: energy savings on the chiller alone are usually $30–$60 per month in zone 5–7 climates.
Will my chiller survive freezing temperatures outdoors?
Most modern chiller units rated for outdoor use can survive ambient temperatures down to about 0°F, but only if water is circulating through them. A chiller that loses power overnight in subfreezing weather can have its evaporator coil freeze and split. Always run the chiller on freeze-protect mode and connect it to a UPS or generator if your area has winter power outages. Pair with our winter plunge safety checklist for the full cold-weather protocol.
Can I add insulation to an existing cold plunge tub without voiding the warranty?
Most manufacturers allow exterior insulation that doesn't penetrate the shell or modify electrical components. Wrapping the outside with foam board, adding skirting, or installing a thicker cover are typically permitted. Drilling, cutting, or modifying the chiller cabinet usually voids coverage. Call your manufacturer before any work that involves modifying their hardware, and document the installation with photos in case you need warranty service later.
Key Takeaways
- Choosing the right insulate outdoor cold plunge tub freezing winter means matching capacity and output ports to your actual devices
- Always check actual watt-hours (Wh), not just watts — runtime depends on Wh, not peak output
- Also covers: winterize cold plunge
- Also covers: cold plunge cover for snow
- Also covers: outdoor ice bath winter setup
- Compare price-per-Wh across models to find the best value for your budget